


Composting for Beginners in the Pacific Northwest: From Kitchen Scraps to Garden Gold
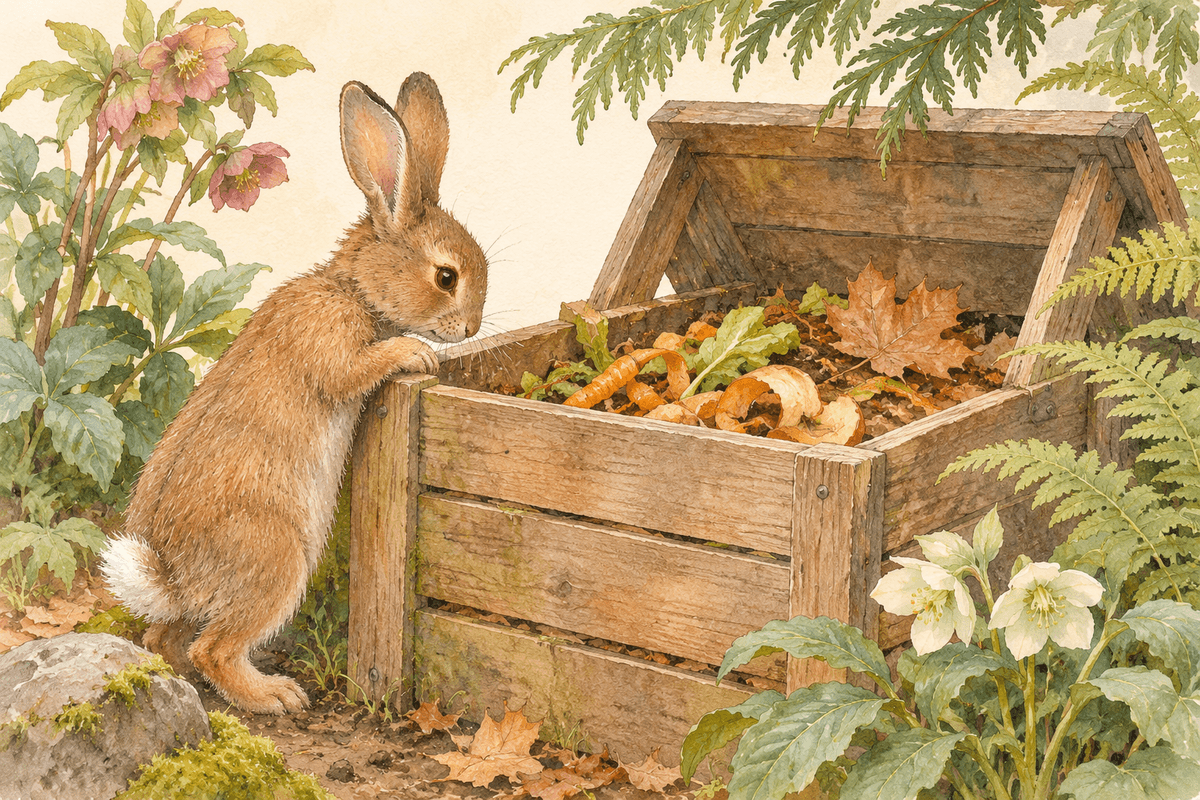
How to choose the right composting system, keep unwanted visitors away, and turn everyday kitchen waste into something wonderful for your garden.
There's something rather magical about composting.
Yesterday's banana peel, this morning's coffee grounds, and a handful of fallen autumn leaves can eventually become rich, dark compost that helps your garden flourish.
But if you've never composted before, the process can seem surprisingly mysterious.
Where do you put everything? Do you need worms? How long does it take? And perhaps most importantly, how do you avoid inviting every rat and raccoon in the neighborhood over for dinner?
A reader recently wrote to The Odd Garden with exactly these questions:
"I have started composting but I’m not sure the best system for my space. I want to be able to use my compost in my garden, but how do I get it from food scraps to soil? How do I make sure I don’t attract rodents or raccoons?"
These are excellent questions, especially here in the Pacific Northwest, where our damp winters, abundant garden debris, and curious wildlife create some unique composting challenges.
The good news? You don't need a large garden, expensive equipment, or a degree in soil science to make excellent compost.
You just need the right system and a little patience.
1. What Actually Happens Inside a Compost Bin?
Composting is nature's recycling system.
In forests, fallen leaves, branches, and other organic materials gradually break down, returning nutrients and organic matter to the soil.
A compost bin simply creates conditions that help this process happen more efficiently.
Inside your compost, billions of microorganisms — primarily bacteria and fungi — feed on organic material.
As they work, they break down kitchen scraps, leaves, and garden waste into a dark, crumbly substance that resembles rich forest soil.
Earthworms and other tiny creatures may help, too.
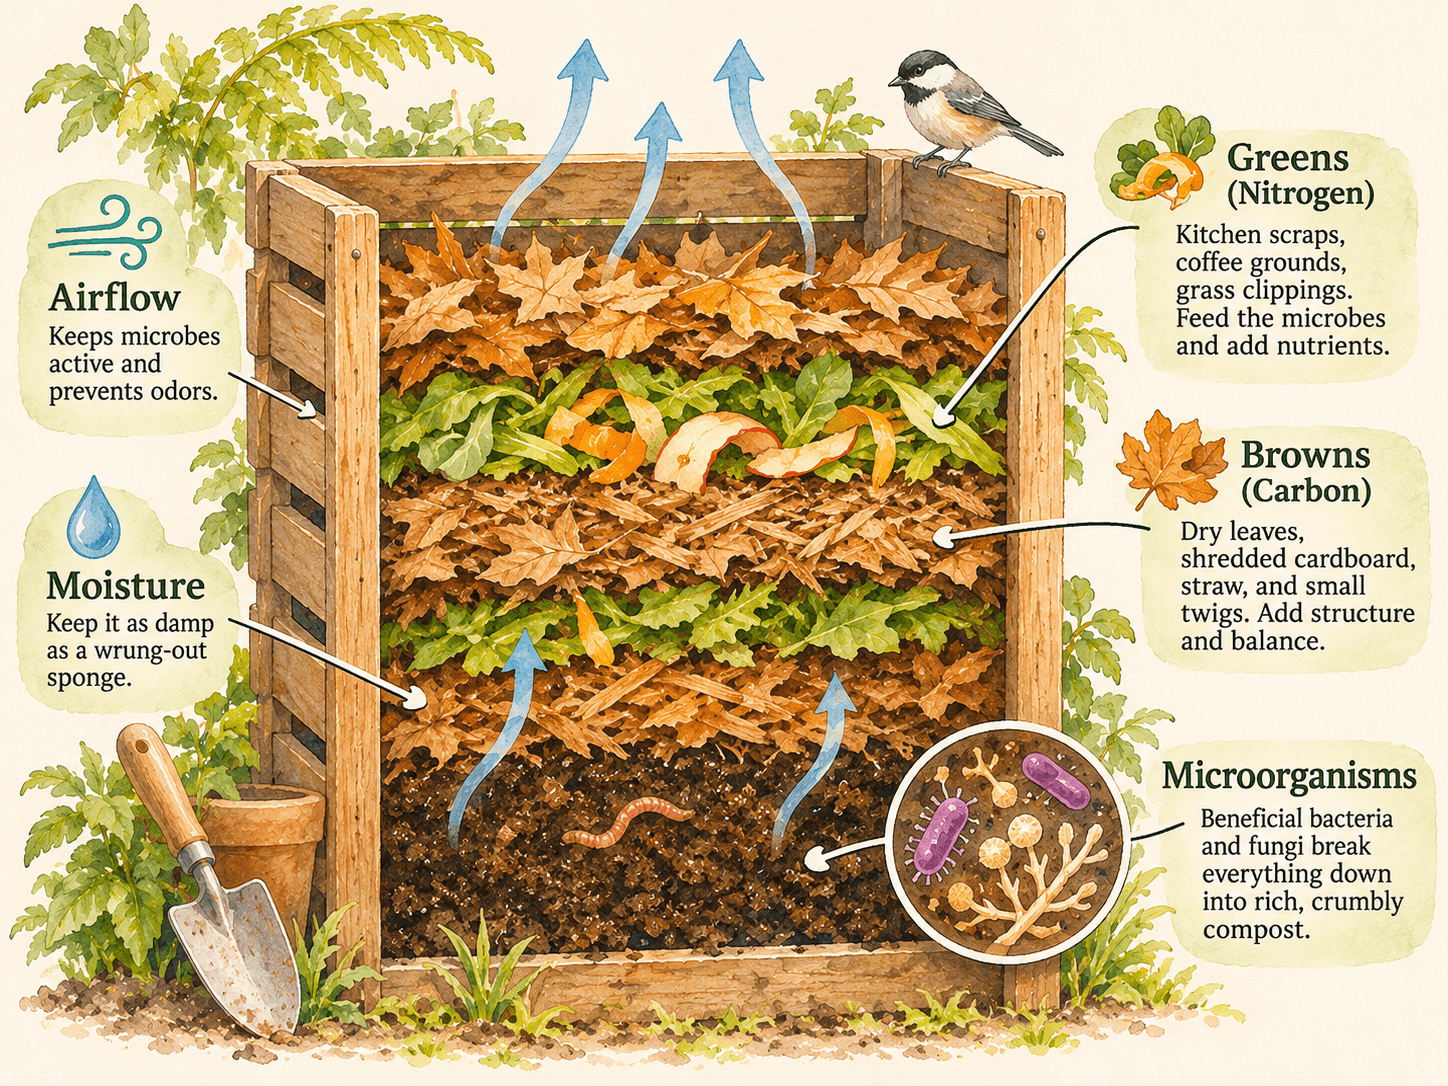
For this process to work well, your compost needs four things:
Greens: Nitrogen-rich materials that feed microorganisms.
Browns: Carbon-rich materials that provide energy and structure.
Air: Oxygen that allows beneficial decomposers to work without creating unpleasant smells.
Moisture: Enough water to keep microorganisms active, but not so much that everything becomes soggy.
Get these four ingredients reasonably balanced, and nature handles most of the work.
One important distinction: compost isn't technically soil. It's an organic soil amendment that improves the soil you already have.
2. Choosing the Best Composting System for Your Space
Not every garden needs the same compost bin.
A gardener with a large backyard and mountains of autumn leaves has very different needs from someone with a small patio and a few raised beds.
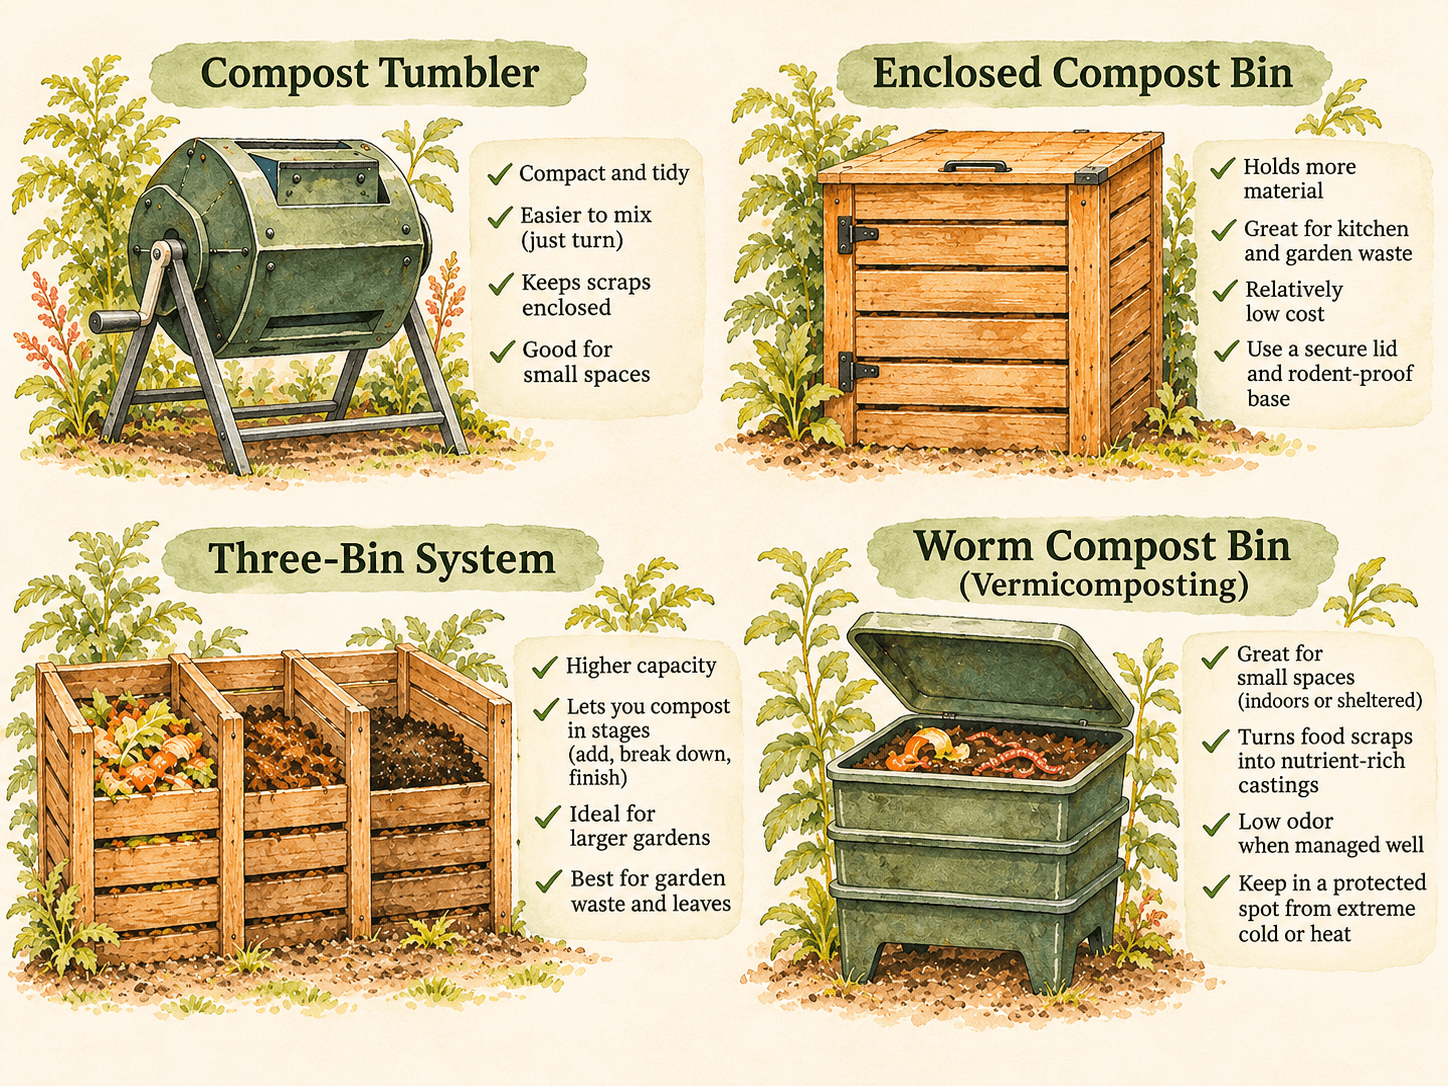
Here are four practical options.
Option A: Enclosed Compost Tumbler
Best for: Small gardens, patios, beginners, and households concerned about wildlife.
A compost tumbler is a sealed, elevated drum that rotates on a frame.
You add kitchen scraps and garden material, close the hatch, and turn the drum periodically to mix everything together.
Advantages
Compact and relatively tidy.
Easier to mix than a traditional pile.
Keeps food scraps enclosed.
Can be more resistant to rodents when properly constructed and secured.
Disadvantages
Limited capacity.
Can become heavy when wet.
May cool down quickly in winter.
Requires enough brown material to prevent soggy compost.
The Odd Garden recommendation: For a small Pacific Northwest garden where raccoons and rodents are a concern, a sturdy, well-latched tumbler is an excellent starting point.
Look for strong hinges, secure closures, and a design without large ventilation gaps. A tumbler is not automatically wildlife-proof.
Option B: Enclosed Stationary Compost Bin
Best for: Medium-sized gardens with regular kitchen scraps and garden waste.
These bins usually sit directly on the ground, allowing worms and other soil organisms to enter.
You add material from the top and eventually remove finished compost from the bottom or through an access door.
Advantages
Holds more material than many tumblers.
Relatively inexpensive.
Good for processing garden waste.
Requires little physical effort.
Disadvantages
Mixing can be awkward.
Compost may take longer to finish.
Open bottoms can allow rodents to enter.
For wildlife protection, choose a secure lid and reinforce the bottom with ¼-inch galvanized hardware cloth. Protect access doors and other gaps, too.
Option C: Open Compost Pile or Three-Bin System
Best for: Larger gardens with plenty of leaves, grass clippings, and plant debris.
This traditional approach uses an open pile or several connected compartments.
A three-bin system allows you to collect fresh materials in one section, actively compost in another, and let finished compost mature in the third.
It's an excellent way to process substantial amounts of garden waste.
However, open systems are less suitable for food scraps where rodents and raccoons are common.
If wildlife is a concern, reserve your open pile for leaves, grass clippings, and other appropriate garden materials.
Option D: Worm Composting (Vermicomposting)
Best for: Very small spaces, sheltered patios, garages, and households producing modest amounts of vegetable scraps.
Worm composting uses special composting worms, typically red wigglers, to process food scraps.
The worms produce nutrient-rich castings that can be added to garden soil.
Worm bins are compact, but they require appropriate moisture, bedding, feeding, and protection from extreme temperatures.
In the Pacific Northwest, a sheltered garage or other temperature-moderated location is often better than leaving a worm bin exposed to winter cold.
Which System Should You Choose?
Your situation | Best starting option |
|---|---|
Small backyard with raccoons | Secure compost tumbler |
Medium garden with food scraps | Rodent-resistant enclosed bin |
Large garden with lots of leaves | Two- or three-bin system |
Patio or limited outdoor space | Worm bin |
Mainly garden waste, little food waste | Simple covered pile or bin |
You can also combine systems.
For example, use a secure tumbler for kitchen scraps and a separate leaf pile for autumn leaves.
This keeps food waste protected while giving you enough capacity for seasonal garden cleanup.
3. What Can You Actually Put in Compost?
Here's where composting becomes surprisingly simple.
Think of your compost as a mixture of greens and browns.
Greens: The Nitrogen-Rich Ingredients
Despite their name, greens don't necessarily have to be green.
Good examples include:
Vegetable peelings and scraps
Fruit scraps
Coffee grounds and paper filters
Fresh grass clippings from untreated lawns
Fresh, healthy plant trimmings
Browns: The Carbon-Rich Ingredients
Browns help absorb moisture, maintain air spaces, and balance nitrogen-rich materials.
Good examples include:
Dry autumn leaves
Shredded plain cardboard
Shredded uncoated paper
Straw
Small wood chips
Dry plant stems
A simple beginner's rule: Start with roughly two to three parts browns for every one part greens, measured loosely by volume.
You don't need to measure everything precisely.
If the compost becomes wet and smelly, add more browns. If it stays dry and barely decomposes, check the moisture and add some greens.
What Should You Avoid?
For an ordinary backyard composting system, avoid:
Meat and fish
Dairy products
Greasy or oily foods
Cooked meals containing animal products
Pet waste
Diseased plants
Invasive weeds or weeds carrying mature seeds
Glossy or plastic-coated packaging
These materials can introduce problems ranging from unpleasant odors and wildlife attraction to plant diseases.
Some municipal composting services accept materials that shouldn't go into a home compost bin. Always check your local collection rules.
4. How to Start Your First Compost Batch
Imagine you've just purchased a compost tumbler.
Here's how to get started.
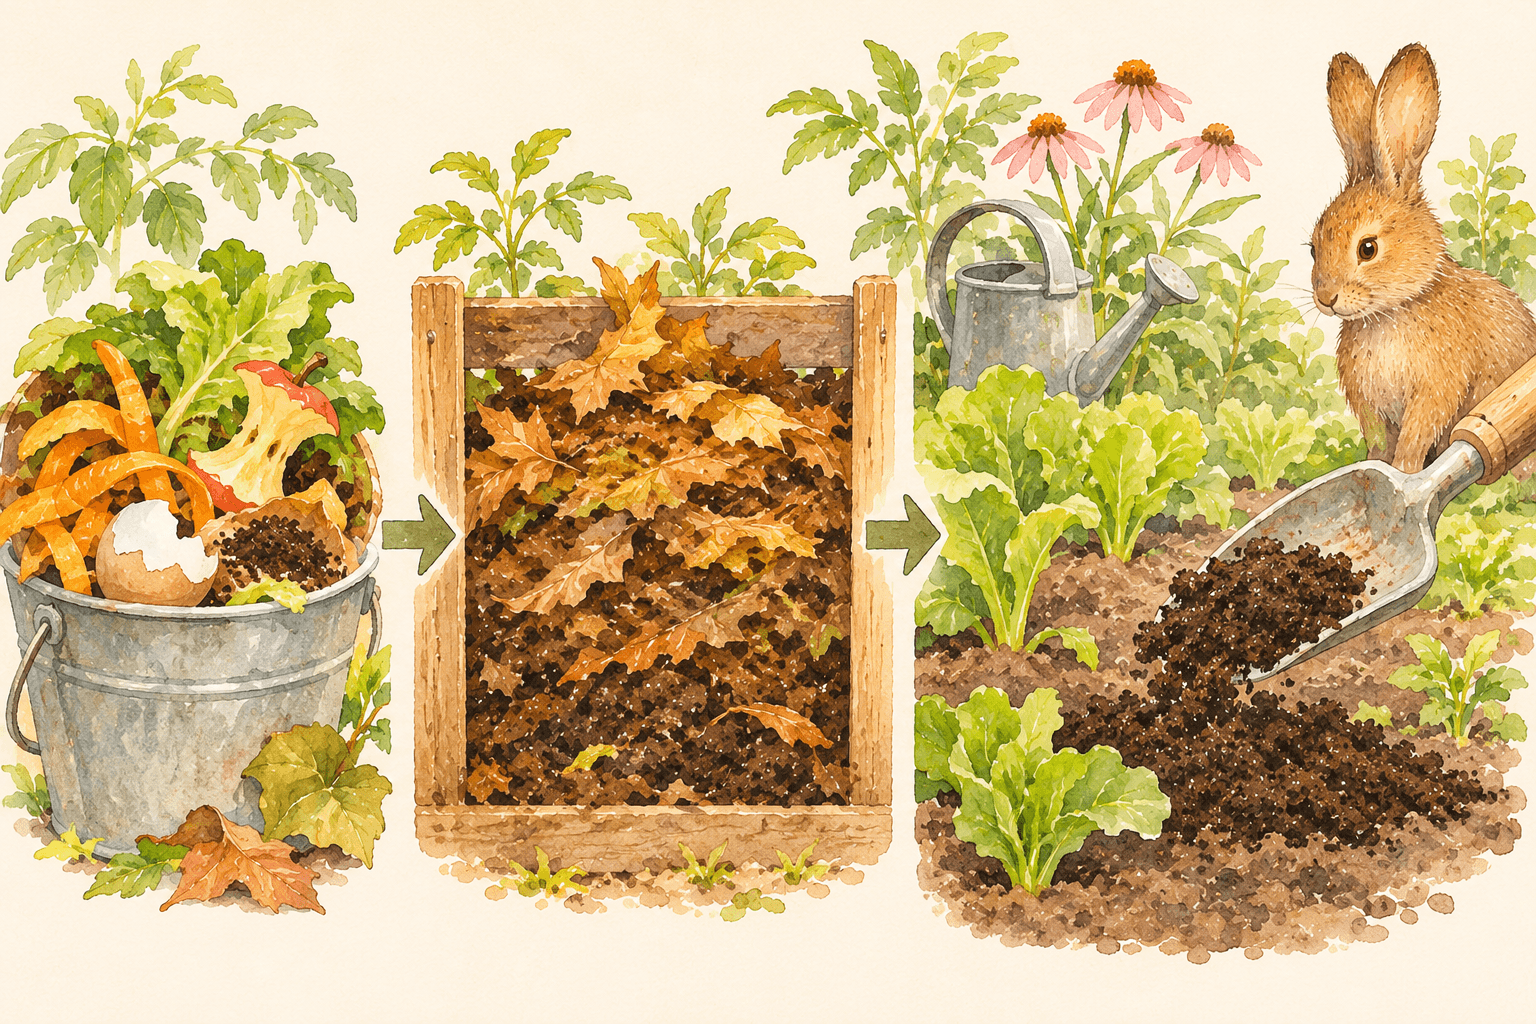
Step 1: Add browns. Begin with a generous layer of dry leaves or shredded cardboard.
Step 2: Add your kitchen scraps. Chop larger vegetable pieces into smaller chunks so they break down more quickly.
Step 3: Add more browns. Cover the scraps completely. This helps absorb moisture and reduce odors.
Step 4: Check moisture. The mixture should feel like a wrung-out sponge — damp, but not dripping.
Step 5: Mix regularly. Rotate your tumbler several times a week, following its instructions. For stationary bins, occasionally turn or loosen the contents.
Step 6: Keep adding materials until your batch is full. Then stop adding fresh scraps and allow the contents to finish decomposing.
A two-chamber tumbler makes this easier: one chamber can mature while you continue filling the other.
You don't need special compost starters or expensive additives. The microorganisms required for decomposition are already present in organic materials and the environment.
5. How Do You Keep Rats, Mice, and Raccoons Away?
This is probably the most important question for anyone composting in a residential Pacific Northwest garden.
Raccoons are clever, persistent, and surprisingly strong. Rats and mice can squeeze through small openings.
Fortunately, good compost management greatly reduces the likelihood of unwanted visitors.
Choose a Secure Container
If you compost food scraps, use a bin with a tightly secured lid.
For ground-based bins, install ¼-inch hardware cloth beneath the compost and ensure there are no larger openings around the sides or doors.
For tumblers, check that the hatch latches securely and the ventilation openings are small enough to exclude rodents.
Never Leave Food Scraps Exposed
Always bury fresh vegetable scraps inside the composting material or cover them thoroughly with browns.
An exposed pile of melon rinds or vegetable peelings is much more inviting than scraps buried inside a properly managed bin.
Avoid High-Attraction Foods
Meat, fish, dairy, fats, and cooked leftovers are particularly problematic in backyard systems.
Keep them out.
Even a well-secured bin can attract attention if strong food odors escape.
Keep the Area Clean
Pick up spilled scraps, clean around the compost bin, and avoid leaving food waste in uncovered buckets nearby.
Check Your Bin Occasionally
Look for disturbed soil, gnaw marks, droppings, damaged vents, or signs that something has tried to open the lid.
If rodents are getting inside, stop adding food scraps until you've corrected the entry points.
The important takeaway: Composting itself isn't the problem. Accessible food scraps are.
A secure system and sensible ingredients are your best defenses, although no outdoor bin can guarantee that wildlife will never investigate.
6. Composting Through a Pacific Northwest Winter
Our climate is wonderful for growing plants, but it introduces a few challenges for composting.
From autumn through early spring, heavy rainfall can saturate compost piles, while cooler temperatures slow decomposition.
Here's how to adapt.
Keep Excess Rain Out
A covered bin or tumbler is particularly useful during our wet months.
Open compost piles should be covered with a breathable or appropriately secured rain cover while still allowing ventilation.
Store Autumn Leaves
Those piles of fallen leaves are composting gold.
Collect dry leaves in a covered container or sheltered storage area so you have browns available throughout winter.
When you add wet kitchen scraps in January, a handful of dry leaves can make a tremendous difference.
Don't Worry if Composting Slows Down
Microbial activity naturally slows in colder weather.
Your compost hasn't failed simply because it isn't producing finished material in December.
Decomposition generally speeds up again as temperatures rise.
Watch for Excess Moisture
If the mixture is dripping wet or smells unpleasant, add dry browns and improve aeration.
Our rainy climate makes this one of the most common composting problems.
7. How Long Does It Take to Turn Food Scraps Into Compost?
This depends on your system, the ingredients, temperature, moisture, and how frequently you mix the material.
Under favorable conditions, an actively managed compost batch may be ready in approximately three to five months.
A cooler, less frequently managed system can take six to twelve months or longer.
In the Pacific Northwest, expect winter batches to take longer.
Remember that repeatedly adding fresh food scraps resets the clock for those ingredients. That's why separating active compost from a batch that's finishing is helpful.
How Do You Know When It's Ready?
Finished compost should:
Be dark brown and crumbly.
Smell pleasantly earthy, like forest soil.
Contain few recognizable food scraps.
Have cooled to approximately the surrounding temperature.
No longer heat up significantly when mixed and left to rest.
You may still find a few twigs, eggshell pieces, or woody fragments.
Simply sift them out and return them to your active compost.
If the mixture smells sour, contains recognizable food scraps, or is still heating strongly, give it more time.
8. How to Use Finished Compost in Your Garden
This is the rewarding part.
After months of collecting scraps, turning the mixture, and patiently waiting, you finally have something useful for your garden.
Vegetable Beds
For an established vegetable bed, spread approximately ¼ to 1 inch of mature compost over the soil each year.
You can gently incorporate it into the upper soil or leave it on the surface, depending on your gardening approach.
Flower Beds and Shrubs
Spread a modest layer around established plants to improve soil structure and support soil life.
Keep compost away from direct contact with plant stems and tree trunks.
New Garden Beds
Compost can be incorporated into native soil when preparing a new bed.
However, don't fill raised beds entirely with compost.
Plants need an appropriate soil mixture, and excessive compost can create nutrient or drainage problems.
Lawns
Fine, mature, screened compost can be applied as a thin topdressing to improve soil conditions.
Avoid burying grass blades under a thick layer.
Containers
Use finished compost as one ingredient in a suitable potting mix rather than using pure compost.
Container plants need adequate drainage and air spaces around their roots.
One final tip: More compost isn't always better. A modest annual application is often more beneficial than repeatedly adding thick layers.
9. Troubleshooting: When Compost Goes Wrong
Even experienced gardeners occasionally encounter compost problems.
Problem | Likely cause | What to do |
|---|---|---|
Rotten smell | Too wet or not enough air | Add dry browns and mix |
Compost isn't breaking down | Too dry, too cold, or insufficient nitrogen | Check moisture and balance |
Fruit flies | Exposed food scraps | Bury scraps beneath browns |
Rodents or raccoons | Accessible food or entry points | Secure bin and remove attractants |
Slimy mixture | Too many greens or excess water | Add shredded leaves or cardboard |
Very dry compost | Insufficient moisture | Add water gradually |
Most composting problems are fixable without starting over.
10. A Simple Composting Routine for Beginners
You don't need to spend hours managing your compost.
A practical routine might look like this:
Every few days: Empty your kitchen scrap container into the compost bin, add dry browns, and secure the lid.
Once or twice a week: Check moisture, mix the contents as appropriate, and inspect for any signs of pests.
Once a month: Check how the material is decomposing and adjust the balance of greens and browns if necessary.
When a batch is full: Stop adding fresh scraps and let it mature while collecting new materials elsewhere.
When compost is finished: Use it in garden beds, around shrubs, or as a soil amendment.
That's really all there is to it.
11. The Odd Garden's Recommendation
For someone starting out in a typical Pacific Northwest backyard, particularly where raccoons and rodents are common, I'd recommend beginning with a sturdy, enclosed compost tumbler with a secure latch.
It doesn't require much space, keeps kitchen scraps contained, and makes turning the material relatively easy.
If you have a larger garden, you can add a separate leaf-composting bin later.
And if you live in a small space or would rather compost indoors, a properly maintained worm bin is another excellent option.
The best composting system isn't necessarily the biggest or most expensive.
It's the one that fits your space, handles the waste you produce, and is easy enough to use consistently.
A Little Patience Goes a Long Way
Composting teaches one of gardening's most valuable lessons: good things take time.
You begin with a collection of ordinary scraps — things that might otherwise be thrown away.
Gradually, with moisture, air, microorganisms, and a little attention, those scraps become something that can help nourish your garden for years to come.
You don't need to get everything perfect.
Start small, keep your food scraps secure, balance your greens and browns, and let nature do the rest.
Before long, you'll find yourself looking at a pile of autumn leaves or a bowl of vegetable peelings and seeing not waste, but possibility.
Happy composting, from The Odd Garden.
Further Reading
For readers interested in the science and practical details of home composting:
Have a composting question or a system that works particularly well in your Pacific Northwest garden? We'd love to hear about it.
Related reads
A few more posts that pair well with this one.
Garden Mistakes I Still Make Every June
→Even experienced gardeners make mistakes. Here are the common June gardening mistakes I still catch myself making in the Pacific Northwest—and what I'm trying to do differently.
Filling In Your Garden (Without Overplanting It)
→Learn how to fill in your garden the right way. Discover simple planting techniques like repetition, spacing, and layering to avoid a crowded, messy garden.
Garden Design for Beginners
→A step-by-step series to help you move from an empty space to a garden that works—covering planning, structure, planting, and the final details.
Not finding the answers?
Have a gardening question or topic you'd like me to write about? Send a request and I'll see what I can dig up.
Enjoying this post?
If you love the whimsy and want to support more PNW garden guides, you can buy me a coffee.
🌼 Buy Me a Coffee