


Propagating Rosemary Through Cuttings

There’s something wonderfully satisfying about growing new rosemary plants from an existing one — a small act of gardening magic. Unlike growing from seed (which can be slow and unpredictable), taking cuttings lets you clone a healthy, established plant so you know exactly what you’ll get: the same fragrance, flavor, and resilience.
Why Take Cuttings?
Rosemary cuttings are not just practical — they’re a way to preserve your favorite plant through the seasons. If you have one that’s thriving in a pot or garden bed, taking cuttings means you can share it, overwinter it, or create a few backups in case the original gets leggy or frost-damaged.
When to Take Them
Late spring through midsummer is ideal. The stems are firm but still flexible — what gardeners call “semi-ripe.” Avoid flowering stems if possible; those are focused on reproduction, not root growth.
How to Take Cuttings
You’ll need: clean garden snips or scissors, small pots, perlite (or coarse sand), potting compost, and a clear plastic bag or dome for humidity.
- 1
Choose your stem
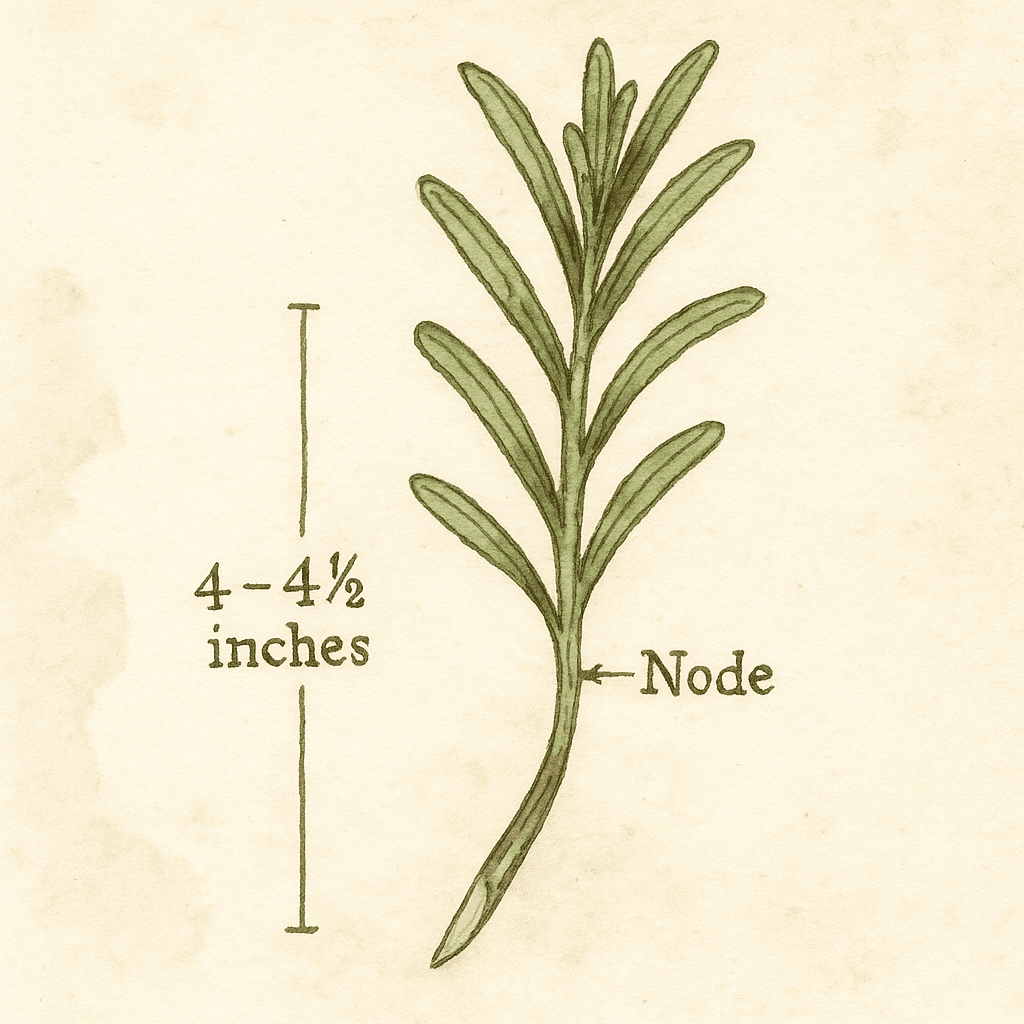
pick a healthy, non-flowering shoot about 10–12 cm long.
- 2
Trim and prepare
strip the leaves from the lower half, leaving a few at the top.
- 3
Cut just below a node
this is where new roots like to form.
- 4
Dip in rooting hormone (optional)
not essential, but it can speed things up.
- 5
Plant in a light mix
use equal parts perlite and compost, or sand and potting soil.
- 6
Water gently and cover
a clear plastic dome or bag helps hold humidity.
Keep the cuttings somewhere bright but out of direct sun. You’re aiming for steady moisture, not sogginess — think of it as a light misty morning, every day or two. Propagating in Water
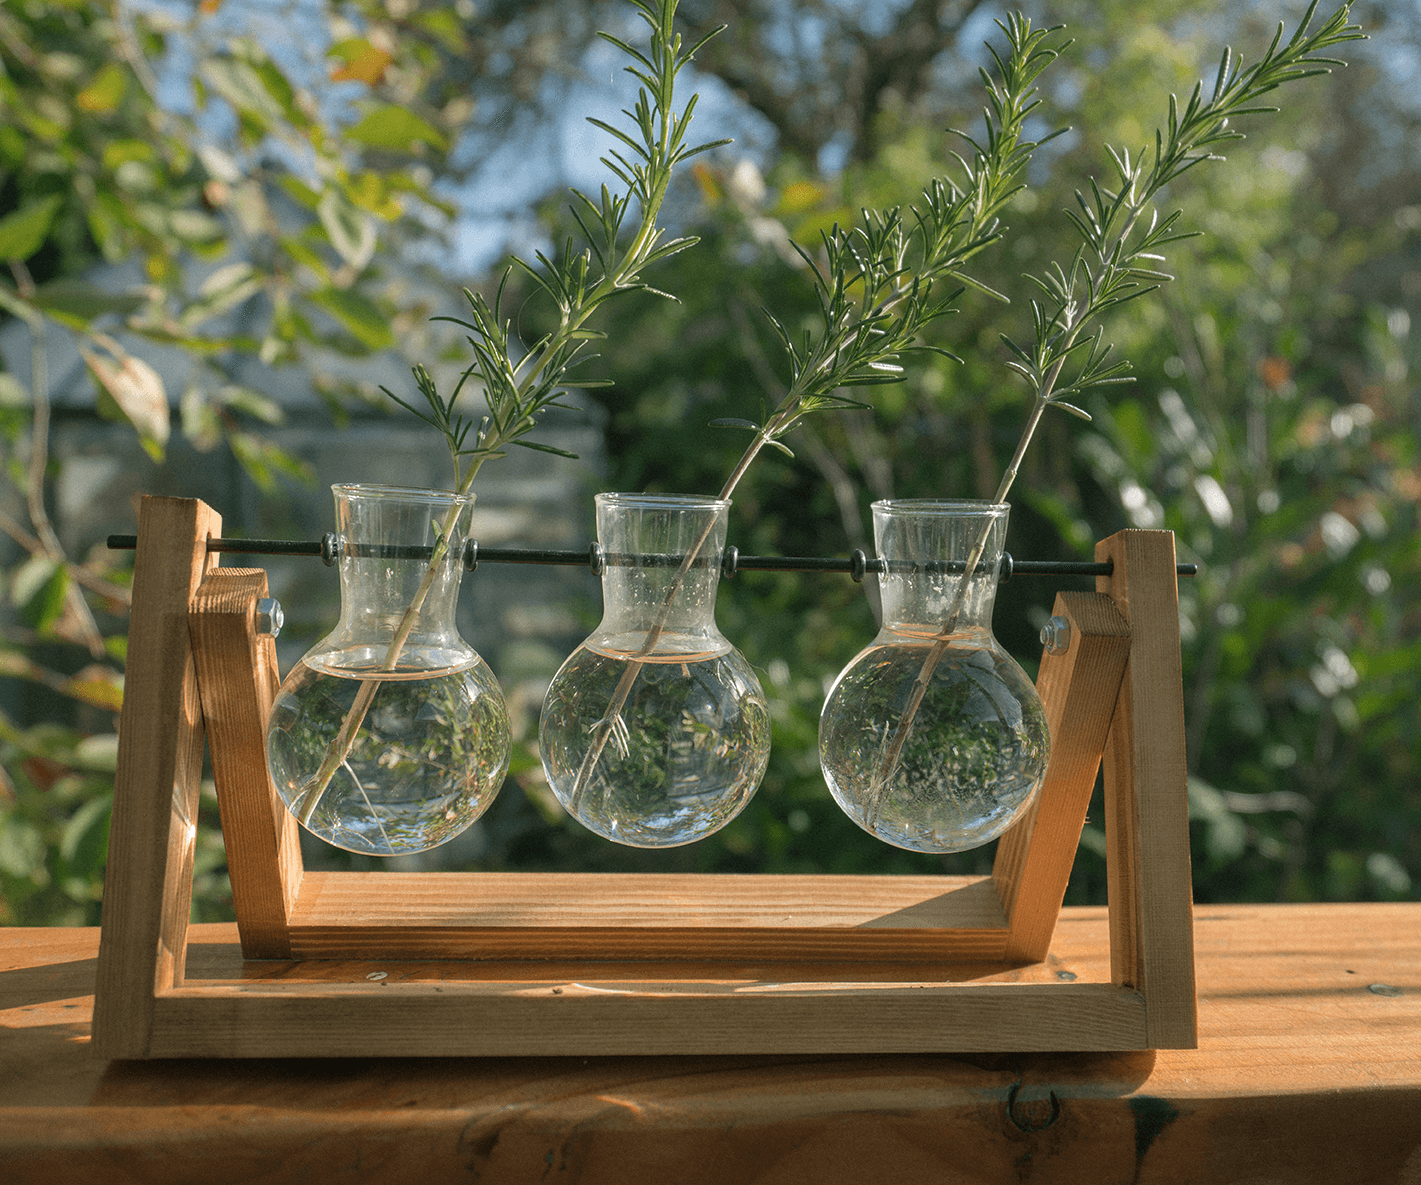
If you prefer a cleaner, more visible method, rosemary cuttings can root beautifully in plain water too.
Prepare your cuttings the same way — remove the lower leaves, keeping just a few at the top.
Place them in a small glass or jar with about an inch or two of water, enough to cover the bare stem but not the leaves.
Set the jar in bright, indirect light — a sunny windowsill that doesn’t get too hot is perfect.
Change the water every few days to keep it fresh and prevent algae buildup.
Wait for roots — tiny white roots will appear along the submerged nodes in two to four weeks.
Once the roots are an inch or two long, the cuttings can be potted into soil. Keep the new plants shaded for a few days while they adjust from water to earth.
Tip:
Water-rooted rosemary often transitions best into a light, airy mix (like compost and perlite) rather than heavy garden soil.
Rooting and Aftercare
Roots usually appear in three to four weeks. Once you see new growth, you can remove any cover and let the young plant acclimate to normal air. Transplant into a small pot of compost, and trim lightly to encourage bushiness.
A Note on Patience
Some cuttings will take, others won’t — and that’s perfectly fine. Even seasoned gardeners lose a few. What matters is the rhythm of trying, observing, and learning. Before you know it, you’ll have a small rosemary hedge ready to scent the whole garden.
Related reads
A few more posts that pair well with this one.
What to Deadhead in June (And What to Leave Alone)
→Not sure which flowers to deadhead in June? Learn what to trim, what to leave alone, and how deadheading can keep your garden blooming longer in the Pacific Northwest.
Why Your Lettuce Suddenly Bolted (And What To Do About It)
→Wondering why your lettuce suddenly grew tall and turned bitter? Learn what causes lettuce to bolt in the Pacific Northwest and how to extend your harvest.
How to Water a Garden Properly (PNW Beginner Guide)
→A simple beginner’s guide to watering your garden in the Pacific Northwest. Learn how often to water, signs of overwatering, and how to help plants grow stronger roots.
Not finding the answers?
Have a gardening question or topic you'd like me to write about? Send a request and I'll see what I can dig up.
Enjoying this post?
If you love the whimsy and want to support more PNW garden guides, you can buy me a coffee.
🌼 Buy Me a Coffee