


How to Start Seeds Indoors in the Pacific Northwest
Starting seeds indoors sounds complicated.
Heat mats. Grow lights. Domes. Labels. Charts.
But here’s the truth:
You only need a few simple things — and a little patience — to grow strong seedlings in a Pacific Northwest home.
Let’s walk through it step by step.
“You don’t need a greenhouse. You need light, patience, and a little consistency.”
Step 1: What You Actually Need (Not the Fancy Stuff)
Basic Seed Starting Supplies
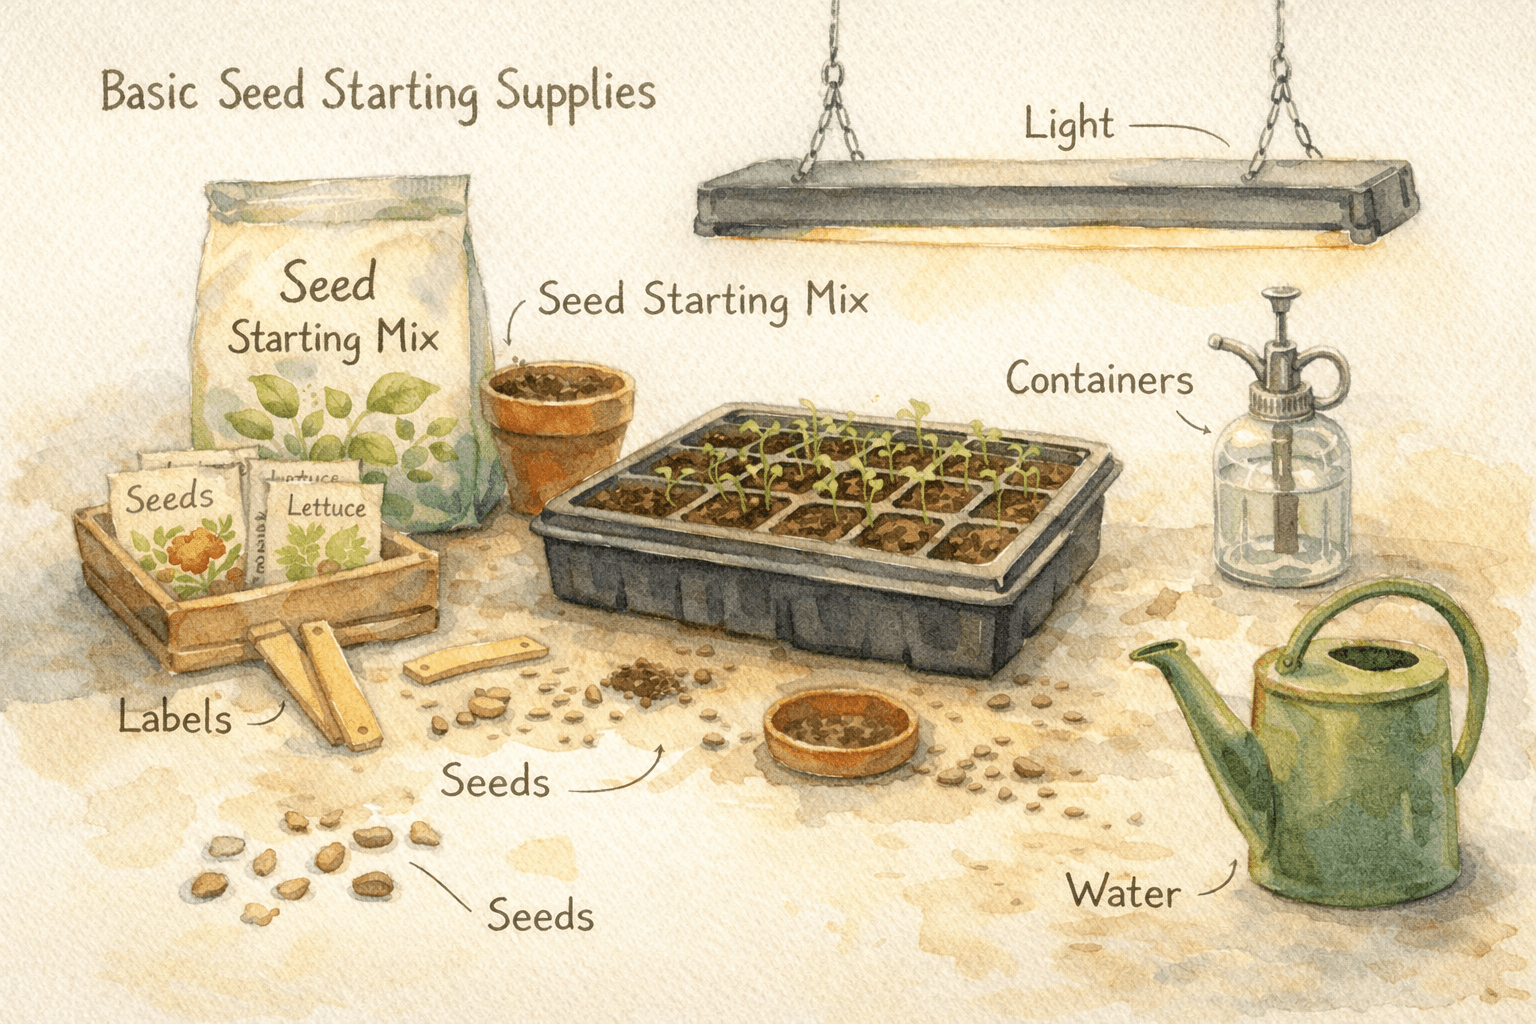
You need:
Seed starting mix (not garden soil)
Containers (cell trays, small pots, or even yogurt cups with holes)
Seeds
Light
Water
Labels (trust me)
That’s it.
PNW Tip:
Because our late winter light is weak and gray, a simple grow light makes a huge difference.
You can try a bright south-facing window — but expect leggy seedlings without supplemental light.
Step 2: Choosing the Right Soil (This Is Important)
Do not use garden soil.
Use seed starting mix — it’s lighter, drains well, and reduces disease risk.
Look for:
Fine texture
No big chunks of bark
Good drainage
Avoid:
Heavy compost
Potting soil with large wood chips
Anything labeled “moisture control”
Step 3: When to Start Seeds (In the PNW)
In western Washington (Zone 8a-ish), most seeds are started:
6–8 weeks before last frost
Typically February–April
For exact timing, see:
Step 4: How to Plant the Seeds
The Actual Process
- 1
Fill containers with moist (not soaking) seed mix
Add seed starting mix to your trays or pots, then lightly moisten it before planting. The soil should feel like a wrung-out sponge — damp, but not dripping. Starting with evenly moist soil helps seeds germinate more consistently and prevents dry pockets later.
- 2
Gently Firm the Soil
Use your fingers to lightly press the soil down. You’re not compacting it — just creating a level, stable surface so seeds don’t sink unevenly after watering. Think gentle, not packed tight.
- 3
Plant at the Proper Depth
Check the seed packet for guidance. A simple rule: plant seeds about twice as deep as they are wide. Very tiny seeds often need light to germinate — press them into the surface instead of burying them.
- 4
Cover Lightly (If Needed)
If the seed requires covering, sprinkle a thin layer of seed mix over the top. Don’t bury seeds deeply — most struggle to push through heavy soil. When in doubt, lighter is better.
- 5
Water Gently
Mist the surface or water carefully so you don’t displace seeds. Bottom watering works beautifully: place trays in a shallow container of water and let the soil absorb moisture from below. This keeps seeds in place and reduces mold issues — especially helpful in our damp Pacific Northwest homes.
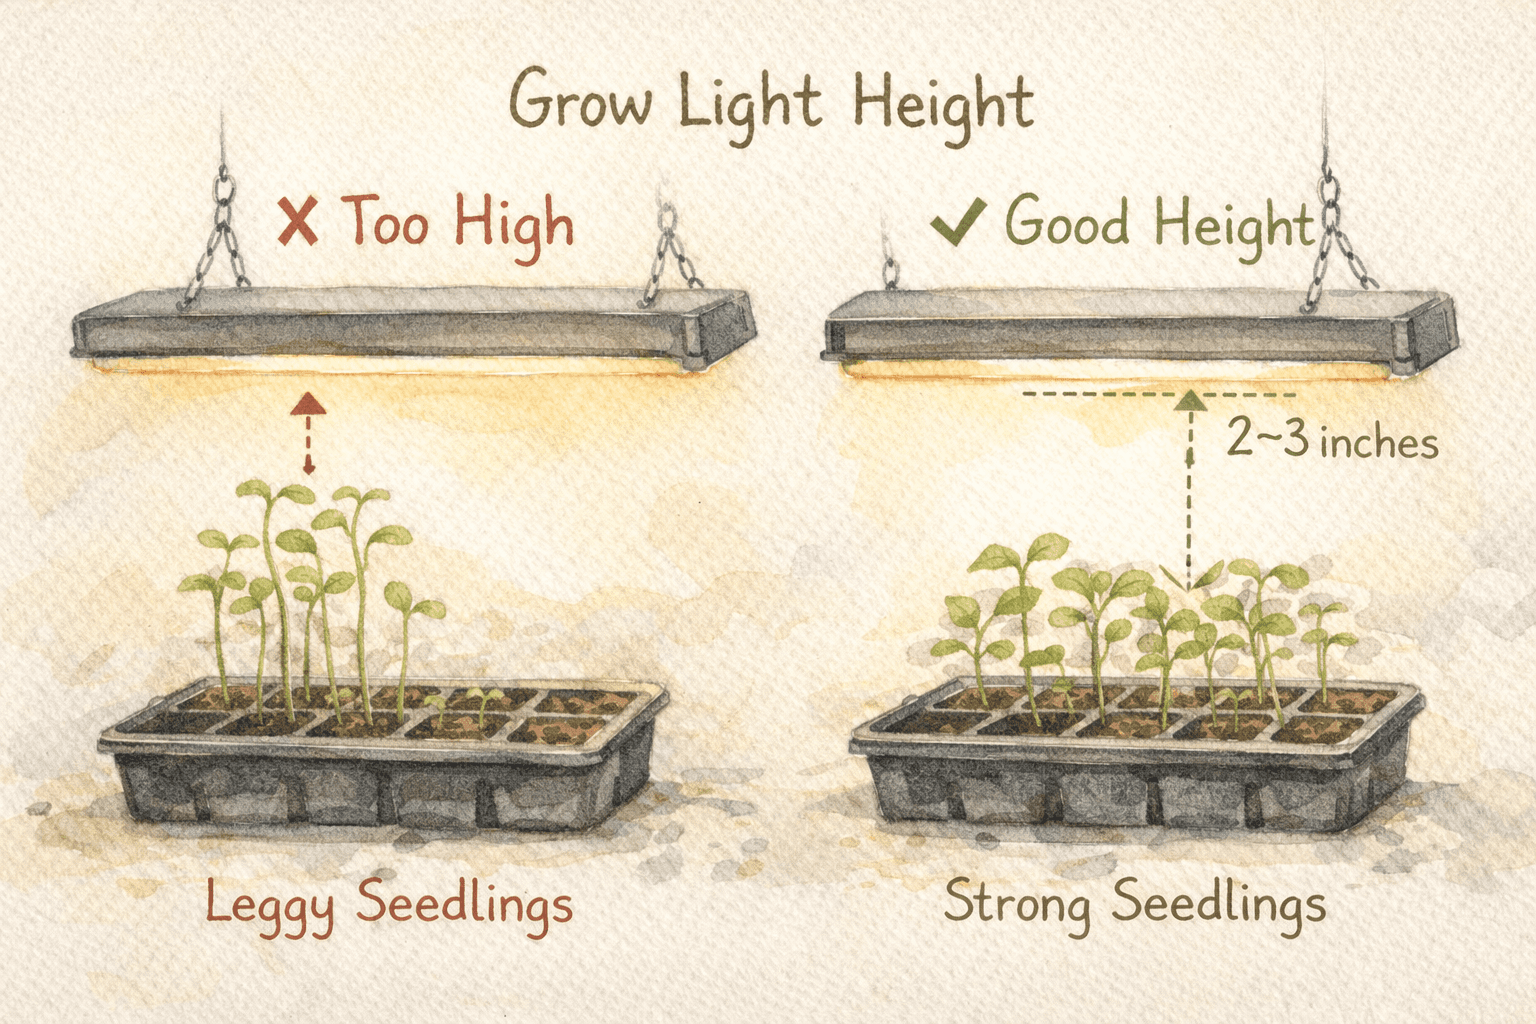
Step 5: Light — The Most Common Mistake
This is where most beginners struggle.
Seedlings need:
12–16 hours of bright light daily
Light positioned 2–3 inches above plants
Lights raised as plants grow
Without enough light:
They stretch
They flop
They fail
“Leggy seedlings usually need more light — not more water.”
PNW Reality:
March light here is not Texas light.
Don’t feel bad about using a simple LED shop light.
Step 6: Watering (The Gentle Way)
Keep soil:
Evenly moist
Never soggy
Never bone dry
Bottom watering works beautifully:
Place trays in shallow water and let them absorb from below.
This reduces mold and fungus gnats — common in damp PNW homes.
“Damp like a wrung-out sponge — never soggy, never dry.”
Step 7: Hardening Off (Do Not Skip This)
Before transplanting outdoors:
Expose seedlings gradually to:
Outdoor light
Wind
Temperature swings
Start with:
1 hour outside
Increase daily for 7–10 days
Skipping this step = shocked, sad plants.
Common Beginner Mistakes
Starting too early
Not enough light
Overwatering
Forgetting labels
Letting seedlings dry out once
Prefer a Printable Version?
Starting seeds is simple — but it’s easy to forget a step.
Download the Odd Garden Seed Starting Checklist (Pacific Northwest Edition)(PDF) and keep it beside your trays this spring.
What’s Easy to Start Indoors in the PNW?
Great beginner seeds:
Tomatoes
Peppers
Lettuce
Kale
Calendula
Basil
“Some seeds will fail. That’s not failure — that’s gardening.”
Gentle Encouragement
Some seeds will fail.
That’s normal.
Seed starting is not about perfection — it’s about learning your light, your timing, your rhythm.
The Pacific Northwest rewards patience.
Related reads
A few more posts that pair well with this one.
How to Start Gardening in the Pacific Northwest | Beginner Guide
→New to gardening in the Pacific Northwest? Learn how to start with climate, soil, and simple beginner wins—perfect for Zone 8a gardeners in Washington and Oregon.
Garden Mistakes I Still Make Every June
→Even experienced gardeners make mistakes. Here are the common June gardening mistakes I still catch myself making in the Pacific Northwest—and what I'm trying to do differently.
The Final Layer: Color, Seasons, and Making It Yours
→Bring your garden to life with color, seasonal interest, and small details. A simple guide to creating a garden that feels personal and evolves over time.
Not finding the answers?
Have a gardening question or topic you'd like me to write about? Send a request and I'll see what I can dig up.
Enjoying this post?
If you love the whimsy and want to support more PNW garden guides, you can buy me a coffee.
🌼 Buy Me a Coffee